Installing a handrail correctly is important, both for safety and for the aesthetics of your home or business. Attaching handrail to brick walls appears more complex than some other surfaces, but it’s a simple project once you know what to do.
Attaching Handrail to Brick Walls
Did you know that falling down the stairs is one of the most common ways that people are injured at home? Handrails provide stability and support as people use stairs, and they can prevent falls and other accidents. Having a properly installed and maintained handrail is one of the best ways to keep yourself and your guests safe.
Attaching handrail to brick walls takes planning and expertise, but it can be done.
Step-by-Step Instructions
Installing a handrail on a brick wall is a building challenge that requires special tools and knowledge. It is not a good beginner project, so if you are not used to working with brick walls and power tools, it’s better to leave this one to the professionals. However, if you know what you’re doing and have the tools you need at hand, it’s a moderately easy project:
- Begin by making some measurements. Make sure to double-check ADA requirements for your handrail. Most handrails must be installed between 34 and 38 inches above the nosing of the stairs, and remain at that height continuously along the length of the stairwell.
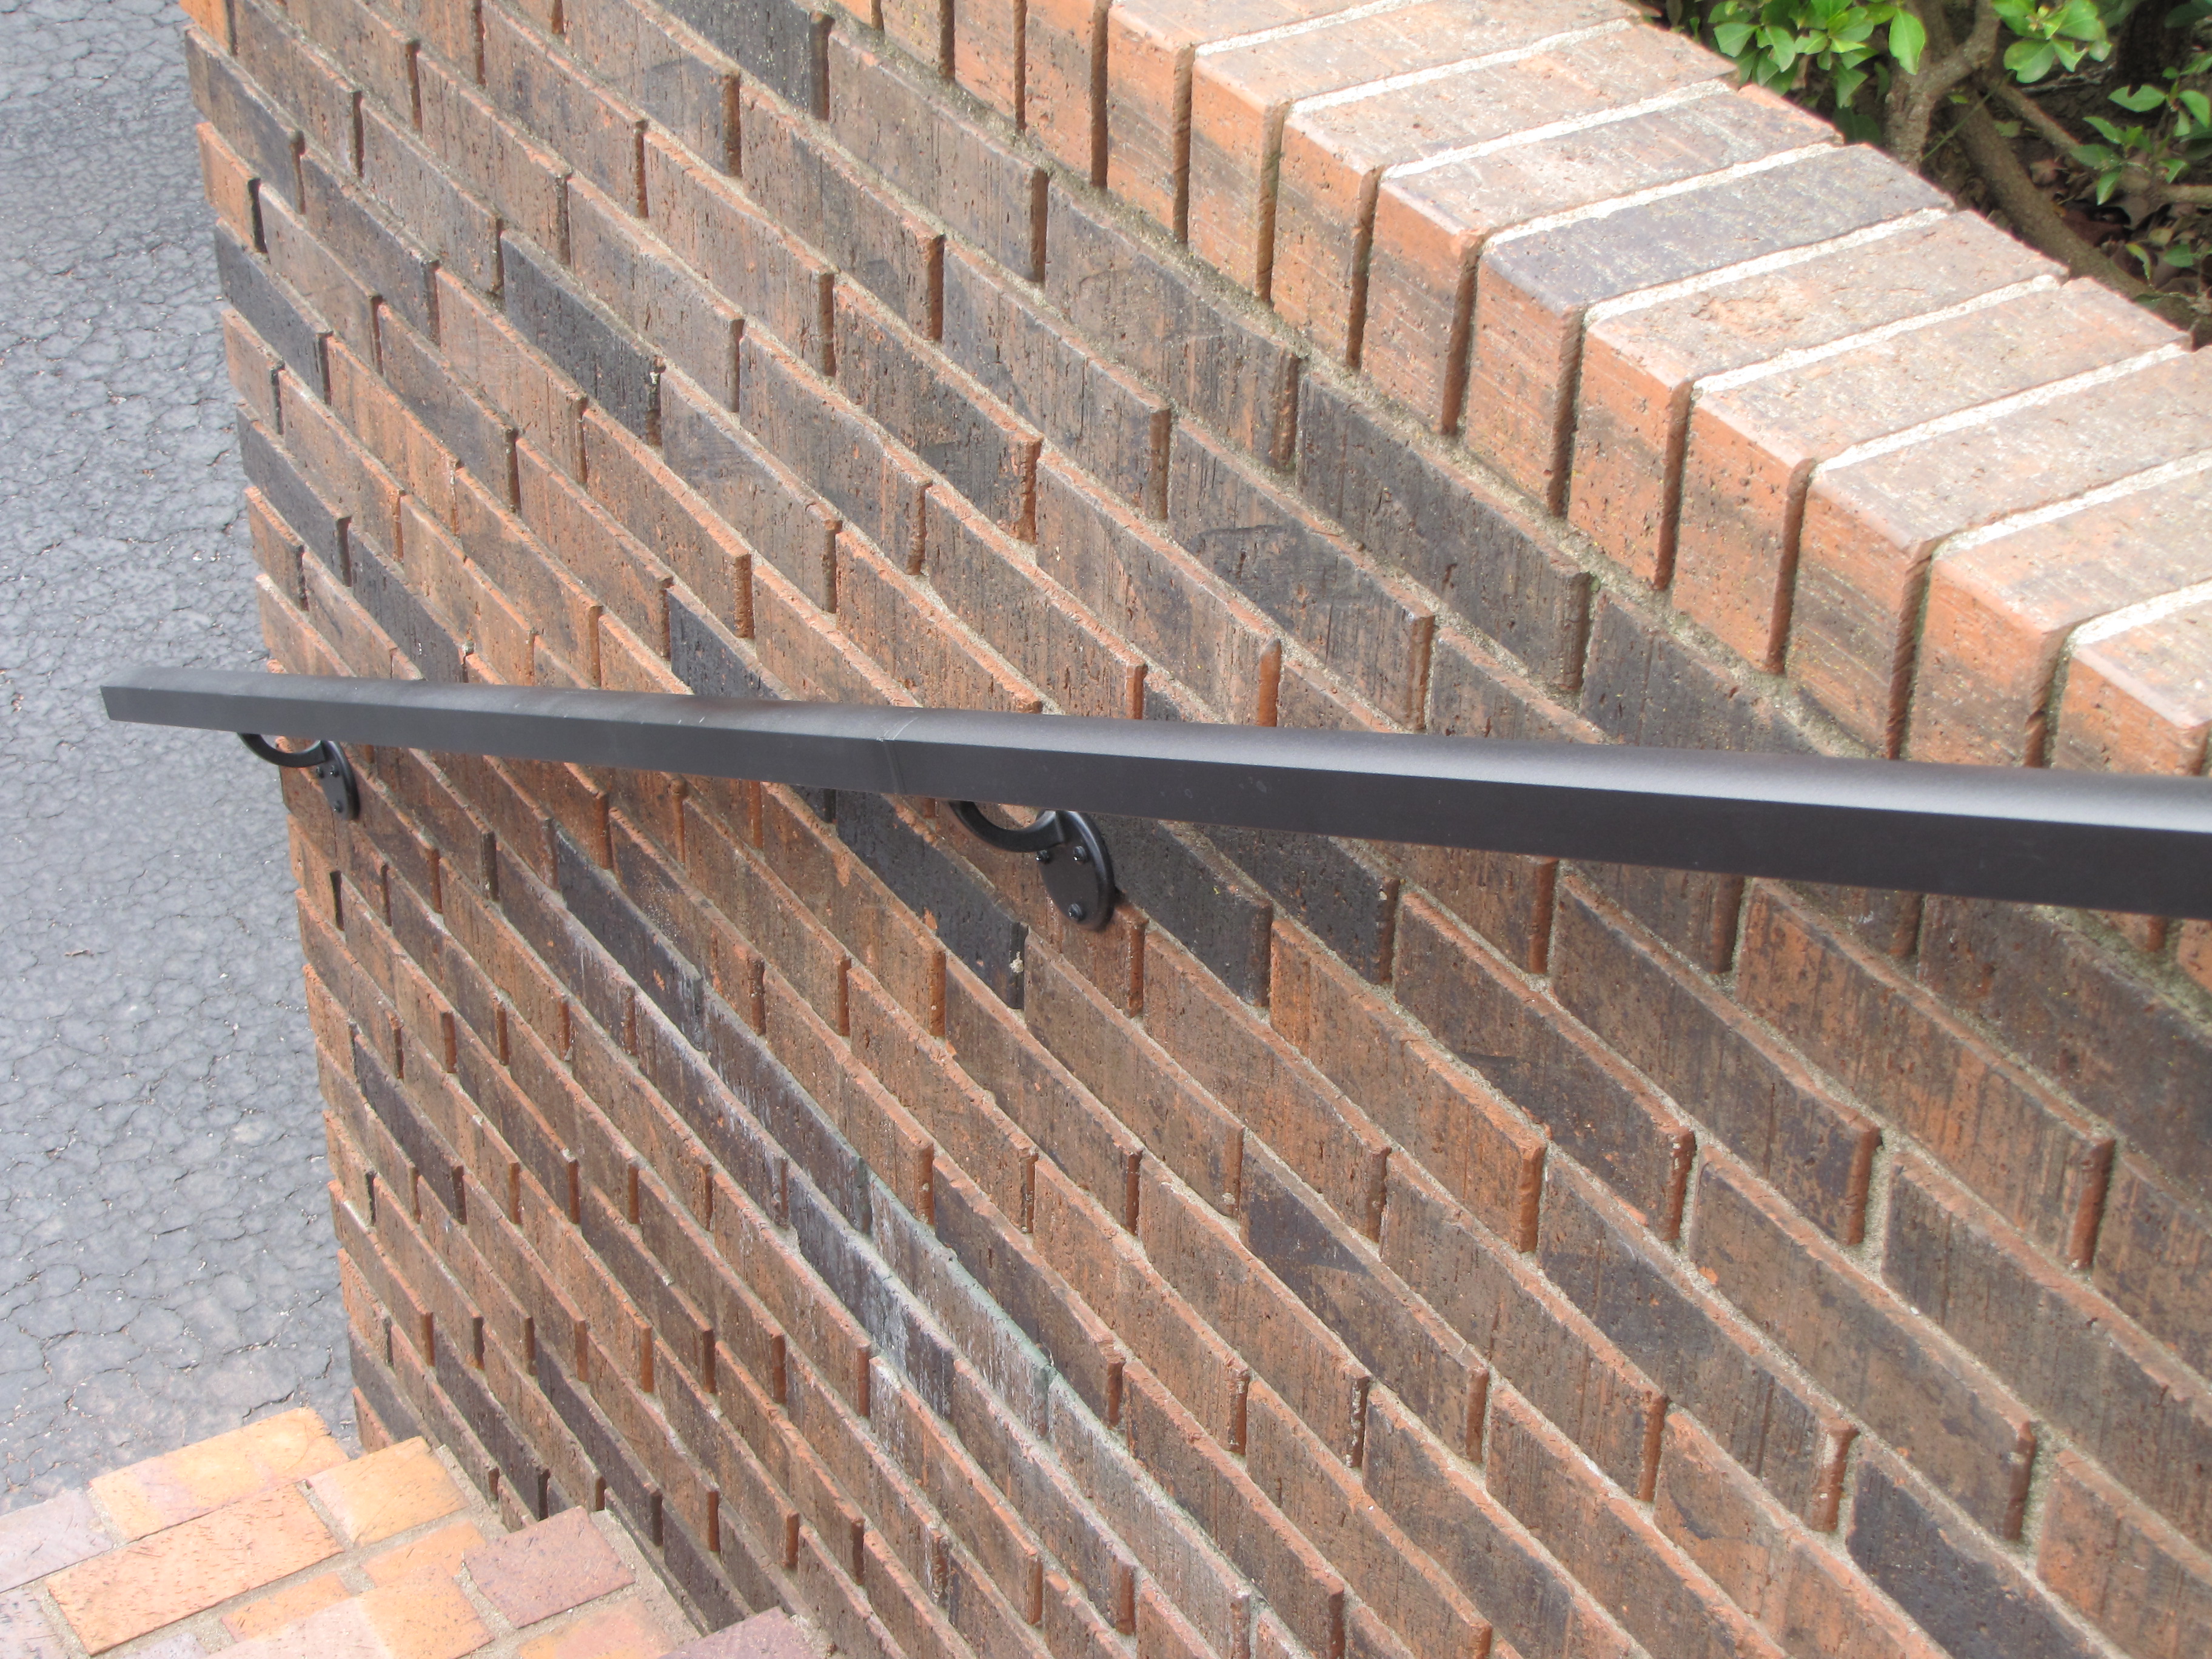
- Use your measurements to determine where the handrail should be placed. Have a friend hold your handrail against the wall in the position you plan to install it, and use a pencil to mark the holes where the railing brackets will be attached to the walls. Be sure to triple-check all measurements before moving ahead to installation.
- Using a hammer drill with a bit that matches the size of your wall anchors, carefully drill holes that will accommodate them. A half-inch by four-inch stud anchor should be adequate for most handrail installations. Do not use an expanding stud, as that can harm the brickwork and make the handrail unstable.
- Once the hole is drilled out, use a bottle brush or small vacuum to completely remove all of the dust in the drilled hole. The remaining dust can interfere with the epoxy and make your installation fail.
- Fill the drilled hole with cement epoxy, and then push the stud anchors into the epoxied holes.
- Let the epoxy dry for at least 48 hours, allowing the material to cure so the stud anchors are securely in place. A handrail must be able to withstand up to 200 pounds of “pull” to be ADA compliant, so don’t rush this important step!
- Once the anchor studs have been installed in the brick wall, you are now ready to install the handrail as you would on any other surface. Follow the instructions provided by the maker of your handrail to attach the handrail to the stud anchors.
Remember: This is a quick and simple guide for your reference, but the professionals know best. Be sure to follow any installation instructions provided by the manufacturer.
_____
Attaching handrail to brick walls isn’t the most complicated building challenge in the world, but it does take more work than you might think. Set yourself up for success by purchasing high-quality hardware with a good warranty. If you aren’t sure what to buy, we can help!
When you need an expert who can help you select a new railing or browse railing accessories, MMC Fencing & Railing is here for you. In our online shop, we sell aluminum and vinyl railing in a variety of styles and colors. So no matter what you’re looking for and no matter how large or small your budget, you’re sure to find something beautiful. Give us a call at 866-931-5002 to get started or to ask about installation options. We look forward to hearing from you!