On warm days and breezy nights, why not take advantage of the nice weather by relaxing or entertaining on your porch or deck? You can string up lights, add deck chairs, turn on some tunes, and bring out refreshing or warming beverages, depending on the weather. But where will you place those beverages? Depending on the size of your deck, you may not have room for tables. Plus, leaving glasses of wine on the ground is a fast way to make a mess. That’s especially true if you have a large number of guests. And no one wants to sit with a sweating glass in their hand all night long. If this is a common conundrum at your home, why not install a drink rail on your railing? Scroll down to learn more about the benefits of drink rails, as well as how to add a drink rail to your Westbury railing system.
How to Add a Drink Rail to a Westbury Railing
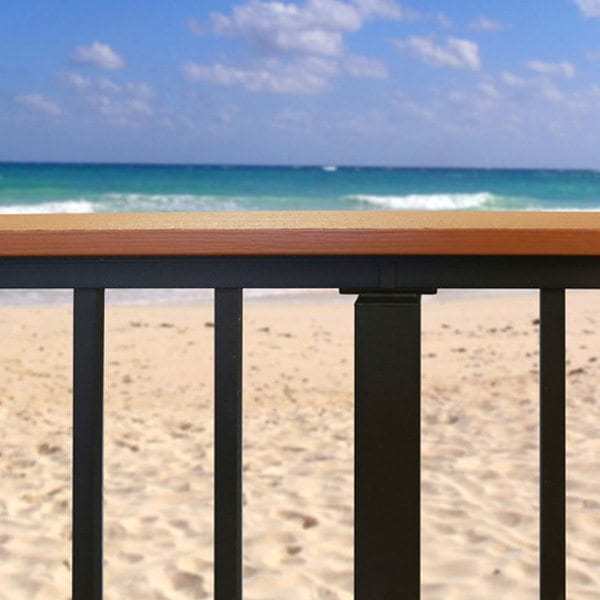
What Is a Drink Rail?
If you’ve ever lounged in an outdoor cocktail bar, chances are you’ve used a drink rail once or twice. As you might guess from the name, a drink rail exists to hold drinks and small bites while you enjoy time in your outdoor space. Drink rails are typically wider than your standard rail. They also go immediately atop the rail to create a flat, level space at the standard deck railing height. Think of them almost like a thin bar, table, or tray directly on top of your railing. Drink rails are a great way to spice up your outdoor area. Why? Because they make your space even more inviting for guests without adding bulky tables or other furniture. Fortunately, installing a drink rail is an extremely simple and surprisingly affordable project that just about anyone can tackle. Read on to learn more about the equipment in your Westbury Adapter Kit, as well as the easy step-by-step instructions you’ll need to install your own drink rail.
Equipment Included in Your Westbury Adapter Kit
Installing your own drink rail is quick and easy, as long as you pay attention to the details. But before you get started, make sure you have all of your equipment on hand. First, you’ll want to have a chop saw to cut your rail adapter to the necessary length. You’ll also need a drill to ensure your railing adapter is screwed securely to the railing. Finally, the following equipment comes with your Westbury Drink Rail kit:
- Pre-drilled aluminum rail (individually sleeved)
- #10 x 5/8″ self-tapping screws
- #10 x 3/4″ screws
Be sure to empty your adapter kit before beginning the installation process. That way, you can double-check that you have all of the necessary equipment.
Adding a Drink Rail to a Straight Rail
- Adding a drink rail to an existing straight rail on your deck is a simple, straightforward process. First, measure the length of the rail and cut the drink rail adapter to the necessary length using a chop saw with an 80-tooth carbide blade.
- When you’ve finished, place the adapter on top of the top rail. Fasten the adapter in place using the #10 x 5/8″ self-tapping screws that came in your rail kit.
- Once the adapter is firmly in place, you can place the drink rail on top of the adapter. Attach it to the adapter using the #10 x 3/4″ screws in your rail kit. Be sure to apply pressure to the drink rail. This will help you ensure that the rail is reliably stable.
Working with a Corner Section
- If you’re attaching the drink rail to a corner section, don’t worry – just start with the corner and work out from there. First, grab two adapters and cut one end of each adapter at a 45-degree angle using a chop saw with an 80-tooth carbide blade. These ends will be meeting in a 90-degree angle at the corner, so cut accordingly.
- Next, place your drink rail adapters on top of the railing. The adapters should meet perfectly at the corner if you cut the 45-degree angles accurately. You may need to recut the ends to get a better fit.
- Check the length of the adapters and, if necessary, trim off the opposite ends (the straight ends) with your chop saw.
- When you’re satisfied with the corner fit and the length, fasten the adapters into place using the #10 x 5/8″ self-tapping screws in your kit.
- Finally, place the drink rails on top of the adapters and attach them using the #10 x 3/4″ screws in your kit. Like with the straight rail adapter, be sure to apply pressure to the corner section drink rail. This will help you ensure that the rail is stable.
_____
As you can see, drink rails are a great way to upgrade your outdoor space. They’re affordable and quick to install, and they make your life much easier if you’re planning to host guests this summer. They also create a welcoming drink rest without adding bulky furniture to your outdoor oasis. If you’re interested in purchasing a drink rail for your Westbury railing system, be sure to check out the Drink Rail Adapter available at MMC Fencing & Railing. Starting at just $44.99, this easy do-it-yourself kit includes a pre-drilled rail and all the necessary screws. It supports wood or composite deck board (no deck board included), and it comes with a lifetime limited warranty. You can install this rail on a Westbury Crossover Post or Standard Post System with just a few pieces of equipment.
Do you have more questions about railing for your outdoor space? When you need an expert who can help you select a new railing or railing accessories, MMC Fencing & Railing is here for you. In our online shop, we sell aluminum and vinyl railing in a variety of styles and colors. So no matter what you’re looking for and no matter how large or small your budget, you’re sure to find something beautiful. Give us a call at 866-931-5002 to get started or to ask about installation options. We look forward to hearing from you!